Showing posts with label diy & craft. Show all posts

26 January 2015

back to school / 2015 / free printable book covers !!

hello everyone !

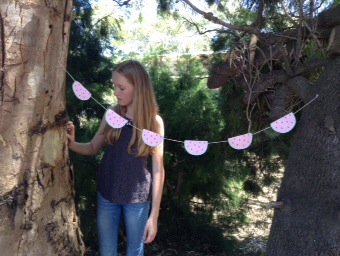
in Australia, school is starting next week ! So I thought I'd make some printable book covers for you all... I did, and here they are ! ( I have only covered one book because mine come on Tuesday )

click here for the printable


( sorry the photo isn't very good )


There are :
- Labels
- Spots
- Clouds
- and Scallops

Basically, just print, glue and cover with contact !!

A couple of things to remember :
- Make sure your Printer is set to colour (unless you are only printing the black and white pages !!)
- Make sure you click 'fit to page' when printing !! I didn't do this and now my covers are smaller than the page, and our printer has run out of ink !!
- Cover your books with clear contact, or otherwise they will get dirty and ripped, and the covers might fall off !!

If you use these, hashtag them to #georginasblogbookcovers on Instagram or email them in and I will feature them below !!

I hope you enjoy,
Georgina x

07 November 2014

watercolour

Hello!

The other day I was water colouring, and I had just bought my iPad Mini, so I thought I'd make a little video! So here it is!


08 October 2014

diy pompom // collaboration with my lily cat blog

today I have a collaboration with the lovely emily of my lily cat blog!

we decided to do a diy on how to make a pompom, as we love all things pompoms! you could save this photo on your computer or phone and look at it later!

we hope you enjoy,
lots of pompoms,
georgina and emily x

03 August 2014

My Loom Love

 Hello lovelies!
In this post I thought I'd share all my looming creations! I haven't made many as I only got my loom two weeks ago* (*at time of writing) and I've nearly run out of bands! I hope you enjoy!
 These are all my bracelets! (and one choker necklace) The single loom is what keeps my loom band container shut, the one I'm most proud of is the starburst, and the prettiest on is the donut choker or the railroad (orange) bracelet!
 These are my charms! The one I'm most proud of is the donut, the prettiest is the watermelon, and the easiest is the heart, which I posted a tutorial about so check it out here.
 These are the ones my friends made for me when I didn't have my own loom! Thanks Jess, Abbey, Harriet and Camryn!
And to finish off, a heart made of my loom creations : )

hope you had/have/are having a great day!
xx georgina

20 July 2014

DIY // Loom Heart

Hello!

I'm super pumped for this post - I hope you can understand it!
I made an iMovie for you all, and uploaded it to YouTube.... I hope you enjoy!!


Music - Come (Back) by Yuna

Comment below what you thought, and if you want more tutorials like this!

Xx Georgina

06 July 2014

DIY // Pom Pom Garland

Hello!

Today's post is a DIY! This is a really exciting post I've had planned for a while now... I hope you enjoy!

DIY Pom Pom Garland


First of all, you need:
+Pom Poms
+Thread/String (preferably in a contrasting colour)
+A big needle

1.Thread the thread/string through the needle. Get the needle, and take it through the pom pom. Drag the pom pom to the end of the thread (leave enough room on the thread to tie to up after) and tie a knot.


Continue doing so to the other end of the thread. Originally I did knots between my pom poms, but I was using thread so it basically was clinging to the string, so I didn't need to tie it. With thread I would definitely tie it!

And you are done! I love how simple it is to do, but how nice it looks! What do you think??

x georgina

13 April 2014

Raindrop Cushion

Hello lovelies,

today I'm going to show you how to make one of these:
rain-drop-pillow-paulet-paula
credit: Charlotte Rivers (ZU)
they are so cute and cuddly!

materials:
fabric
scissors
pencil/pem
needle and Thread/Sewing Machine
hobby fill

1. Cut out of the fabric a raindrop shape with your scissors. (Make it the size you want your raindrop cushion to be)
2. Using this as a template, draw a another raindrop onto fabric.
3. Cut out the second raindrop.
4. With the print on the inside, sew the two pieces together almost all of the way.
5. Turn it inside out, so your print is on the outside
6. Fill it with the hobby fill.
7. Sew the last part and then:
TA-DA! Your raindrop cushion is finished!

I hope you enjoyed this post, and would love to see what yours turn out like! hash tag it on instagram to #ddraindrop and I'll put it on my blog!

xo georgina

07 April 2014

top 30 DIYS // milky way blog

hello lovelies,

over the past few weeks, I've been working with the lovely Georgia from Milky Way Blog on a post for you all! we've gotten our top 30 DIYS together for you!

Here they are!

ideas from bloggers:
- washi tape bunting (vanillacraftblog)

- tassel garland (uhmchelsea)
- pressed petals (imborgurkusblog)
- pompom sunnies (misszaliblog)

- macrame plant hanger (alittlebirdyblog)
- lips and mustache mugs (belovedbluebird)
- chalkboard cat (vanillacraftblog)
- animal bookmarks (alittlebirdyblog)
- salt spray (imborgurkusblog)
- secret miffy box (misszaliblog)
- palmiers (floralled)
credit: floralled
- bunting flags (milkywayblogger)
- tag tree (milkywayblogger)
- succulent in a shoe (bonesblogger)

IMG_7154
credit: uhm chelsea
- fruity garlands (uhmchelsea in pineapple and watermelon)
- ribbon bookmark (atinybutterflyblog)
- paper succulents (vanillacraftblog)
- collar accessory (emilyjaneblog)

random ideas we thought of:

- tea cup candle
- paper mache fruit
- floral headband
- wind chime
- banana-honey face mask
- fringlet
- chalkboard covered exercise books
- mason jar candle holders
- paper chain made of hearts
- icecream cone balloons
- hair bow
- cardboard tissue box holder 'rabbit or bunny'

comment if you'd like us to put a post up on how to make some of the random things we thought of!
we really hope you enjoyed this post!!
xo georgia and georgina

02 March 2014

DIY Paint Chip Heart Garland


Hello little daisies,
Today I am going to teach you how to make a DIY paint chip heart garland.

You will need:
- Paint Chips

-Scissors

-String (as big as you want your garland to be)


-washi tape/masking tape/glue gun


1. Arrange your paint chips in colour order. Then cut them into similar sized sqaures.


Keep the scraps for future crafts.


2. Now cut your squares into hearts. Having them as squares means they will be a similar size but you can skip that step if you want to.


3. Take your hearts and arrange them the way you want them.


4. Glue/tape your hearts onto the string.


5. It should look like this:

Done!


Thanks for reading,

Georgina xx